Sarah Hutchins shares her experiences and tips on how to get started with your own social media content.
Deciding what to film
Once you have decided where you might want to film, you can then decide on the type of content you want to create and also what you might want to film.
In my case I knew that I wanted to make short phonics videos, share nursery rhymes and read stories. Having looked at what other people were filming and uploading to social media I then had an idea of the format that my content might follow which then helped form my ideas when I began experimenting with filming. I also used my experience from working within settings to help me to work out what I was going to say and do for my ‘virtual’ audience.
Top tip: Look at content on social media to help you decide how and what you want to film in your videos. You can then come up with your own plan based on your own ideas and experiences and also from learning from the ideas of others.
The fun begins, filming, trial and error
When you begin filming it is very much trial and error to start off with – get stuck in and go for it – however silly you might feel talking to your phone/tablet! Having several ‘goes’ at narrating your content will also help you to refine your style. From trial and error my preference is for my content to be unscripted when I film, I have an idea in my head of what I want to do and I go from there. Equally you might want to have cue cards or the key points of your video planned out, do whichever works best for you. Similarly, I have filmed my videos on my own but you might want to enlist the help of a friend to do them with you!
From your ‘trial and demo’ content you might review your videos for:
- Your language choices – does your speech pattern make sense and match the audience you are hoping to reach?
- The speed at which you are speaking – too fast/too slow/just right?
- Your body language, what are your hands doing in the shot and if you are sitting down/standing up/moving about what is your body angle like in front of the camera?
- Do you appear startled or flustered or natural in front of the camera?
- Where are you looking – is it directly into the camera?
- What are you actually saying and talking about – is it clear?
- If you are using props – are you showing and sharing them to the camera or are they not visible within shot?
- What is your lighting like – are you in shadow on one side of your face or can you be seen in an even light and clearly focused?
- Have you picked up background noise on your filming or are you audibly clear?
- Do you need to adjust your camera angle – is it spot on or angled too much upwards or downwards?
- Are you having fun in what you are doing!?
Top tip: Once you have the setup of your gadget (phone/tablet/other) to film on remember to look into the little camera aperture of your phone/tablet as if that was your audience.
Using Props
While filming you can decide if you want to use props and resources to support what you are sharing with your audience. This is entirely up to you! Throughout my phonics videos I use a phonics puppet. He is a very colourful handmade creature called Monster Crunch who has a pouch in his tummy! If I am filming a phonics video, I then use supporting resources and props that I have collected to help me show and share the sound. These are helpfully hidden in Monster Crunch’s pouch for me to pull out as I narrate my content. While my videos are unscripted, these small props act as a visual guide to keep my thoughts on track. When filming with props you also need to remember that you have to show and share them to the camera on your phone/tablet while you are filming. This can take a bit of practice, although if you have been in a setting or classroom working with children, it is very similar to when you share items and objects or a story with them at carpet time or in small group time.
Top tip: When using props remember to show and share them ‘away’ from you towards the camera so your audience can see them.
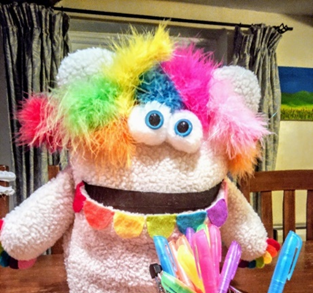
The photo above shows Monster Crunch my handmade puppet.
Filming your Content
You can film content on pretty much any handheld phone or tablet device. You could even use a GoPro device as well! When filming I have used a wooden tripod art easel to hold my iPad still. This allows me to line up my screen with the area I am filming in and it remains steady and in shot for the duration of my filming session. You can also do this by propping your phone/tablet up against something so it does not wobble about. Once I’ve set the iPad in recording mode and pressed ‘record’, I then run around the front of the iPad and sit down to begin filming.
Top tip: Do remember that your will most likely want to edit your videos so let the film run for a few extra seconds before you begin narrating your content and after you have finished recording your video and before you stop recording.
Editing your Content
Once you have created your first content you will need to decide how you want to edit and then publish your videos. I use my laptop to download the videos I have taken from my iPad onto. I then use the video editing in Filmora. This works the same way as iMovie or other kinds of movie/video editing apps that are available on your phone, tablet or laptop/desktop computer.
To edit your videos, you initially need to download the content you have created. I start by downloading the ‘raw’ footage into a folder so I have got copies. I then import it into the video creator app (I use Filmora). Have a look at other peoples created content to get a feel for how videos are laid out. Generally, the film editing app will let you upload the film footage you have shot so it appears as a continuous frame by frame reel that appears across your screen. To create a ‘finished video’ ready to upload onto social media your video needs to have an introduction, the main content and an end.
Top tip: When editing your content, you might like to think of your video project as a collection of building blocks.
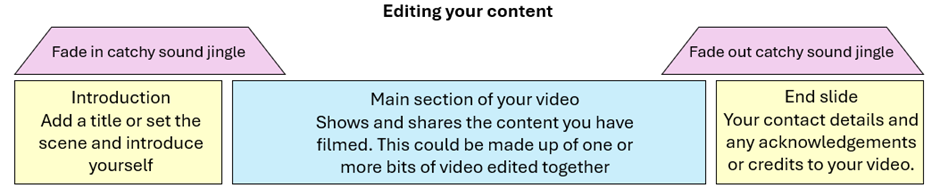
In your chosen film editing app you can do this by dropping and dragging your ‘blocks’ of film content into place. You might want to put an introduction block in front of your main video content block and then add an end frame block to finish your video. The content (wording and imagery) of the introduction and end frames can be made in the film editing app or created elsewhere and imported. I used PowerPoint to create and edit my images. I then use the snip tool to take and save photo clips of the images I want to use to specifically created for my introduction and end frames. You might want to think about adding a jingle/music to the beginning and end of your video. I have overlayed music (it is a catchy banjo tune from pond5 music) to the beginning and end of my videos. This adds another layer of continuity to my content and also helps make my videos unique and recognisable.
You might want to think about:
- Editing your content to remove the ‘extra’ footage you do not need at the beginning and end of your video.
- Stitching one or more edits of video together in your main video content block
- Creating an introduction ‘still’ slide (see information section about using PowerPoint to create artwork).
- Adding music to the beginning and end of your video.
- Adding an end ‘credit’ slide to your video.
- Remember to credit and acknowledge material used that is not your own.
A word on copyright
It is also worth noting that for copyright reasons, should you use resources or props that have not be made by you or are someone else’s work it is essential (and good practice) to give credit and acknowledge the source of these resources on your end slide. Do also check for creative commons licences. For example, in my Nursery rhymes videos, I use Priddy Books and pond5 for my music, so on my end frame I acknowledge this.
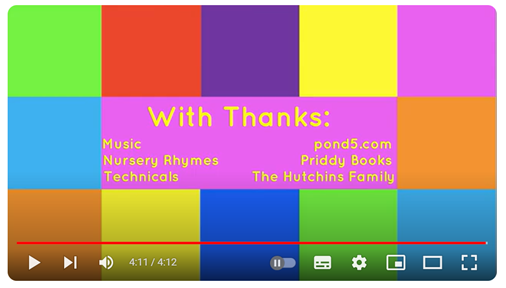
The image above shows my credits at the end of a one of my Nursery rhymes videos.